
The next thing we learned about was rotational inertia, which we soon found out was a property of an object that resists change in spin or rotation. One of the first examples we used was an ice skater, and we looked into why the skater spins faster when they pull their arms and legs inwards. We found out that when the skater pulls in their limbs, they are moving their mass closer to their axis of rotation, therefore lowering their rotational inertia and increasing their rotational velocity. This is what allows them to spin faster, as you can see below. We also learned about angular momentum in this section, which is rotational velocity times rotational inertia. We also need to know that angular momentum before is equal to angular momentum after, which also applies to the image below.

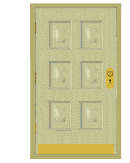 The next thing we learned about was torque, and the formula for torque is torque=force x lever arm. I also learned that torque causes rotation. A lever arm is the distance from the axis of rotation, so if you have a big lever arm then you have a small force, and if you have a small lever arm you have a big force. A scenario we used was opening/closing a door, because we found that the hinges are placed where they are because it allows a greater lever arm, which will result in a easier force to open it.
  Following torque we learned about center of mass/gravity, which I found very helpful and interesting. The center of mass is the average position of all the mass, which is near the waist on most people. We used the example of why wrestlers bend their knees and spread their legs when wrestling. We found that lowering your body lowers your center of mass which makes you more stable, and also having a wider base makes you more stable, because your center of mass is easier to stay in your base.
The last thing we learned about was Centripetal/Centrifugal Force. I found that centripetal force is a center or inward seeking force, and centrifugal force (even thought it's technically not a real force) is a center fleeing force. The most important problem was what was the force that pushes you against the car door when you're turning in a car. The answer to this problem is that there is no force actually it is Newton's laws, where the 1st says that you are moving and you want to keep moving, and the 3rd is that the you push the car door and the car door pushes you. Below is a helpful diagram.


